In this post we’ll build a library, a todo list and a blog with Django. We will create a library first. Create a directory and name it “code”. Inside “code” create another named “library”. Start a project and call it “library”. Now create an app and name it “books”. Add it to the installed apps in the “settings.py” file.

Write the models for the app you just created.

Register it to the “admin.py” file.

Create Superuser
Login as admin
Now you can add books
We want the books to be displayed as a list. That’s why we will use “ListView”


Now we are going to add an API.
Install Django Rest Framework

Create a new app and name it “api”. Add it to the settings file.


Create a urls.py file within the api app and add the following:

Write the view of BooksAPIView

Create a serializers.py file in api and add the following code

TODO
Now we will build a Todo API backend. Make a “todo” folder in the “code” folder and then a “backend” folder in the “todo” folder. Activate the virtual environment. Create a new project: “todo_project” and create an app: “todos”.
In the settings.py file, add the following code:

Now we will create our database. Enter the following code in the models.py file.

Register the model in the admin.py file.

Next, create a superuser in order to login as the admin of the page. Now you can login, see the tables and add your Todos.

Next install djangorestframework and add it to the settings.py file

Add the following code to the urls.py file in “todo_project” folder.
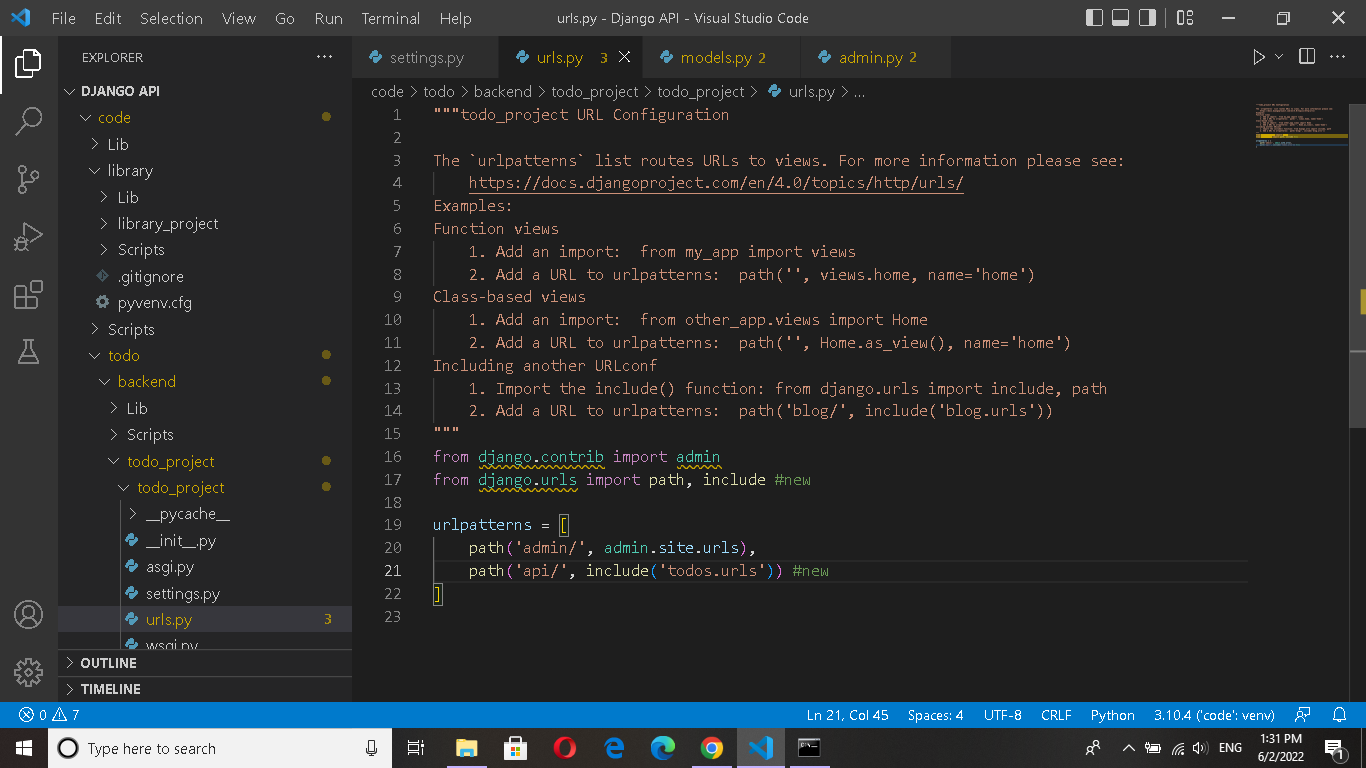
Create an “urls.py” file in the “todos” app and add the following code to it.

Now create a “serializers.py” file in the “todos” app and add the following code.

Now we’ll write the views

Now you can run the server and everything should be working perfectly.
Now we’ll deal with CORS. We will use “django-cors-headers”. Install “django-cors-headers” and add it to the “settings.py” file.


Now open the “tests.py” file and add the following code

Now we’re done with the backend.
Now we will create the front end. First install NodeJs and create a new app (with npx create-react-app) named “frontend” in the “todo” folder. Change the code in the “src/App.js” file to the following.


You will now see your todo list in https://localhost:3000/ that you created earlier.

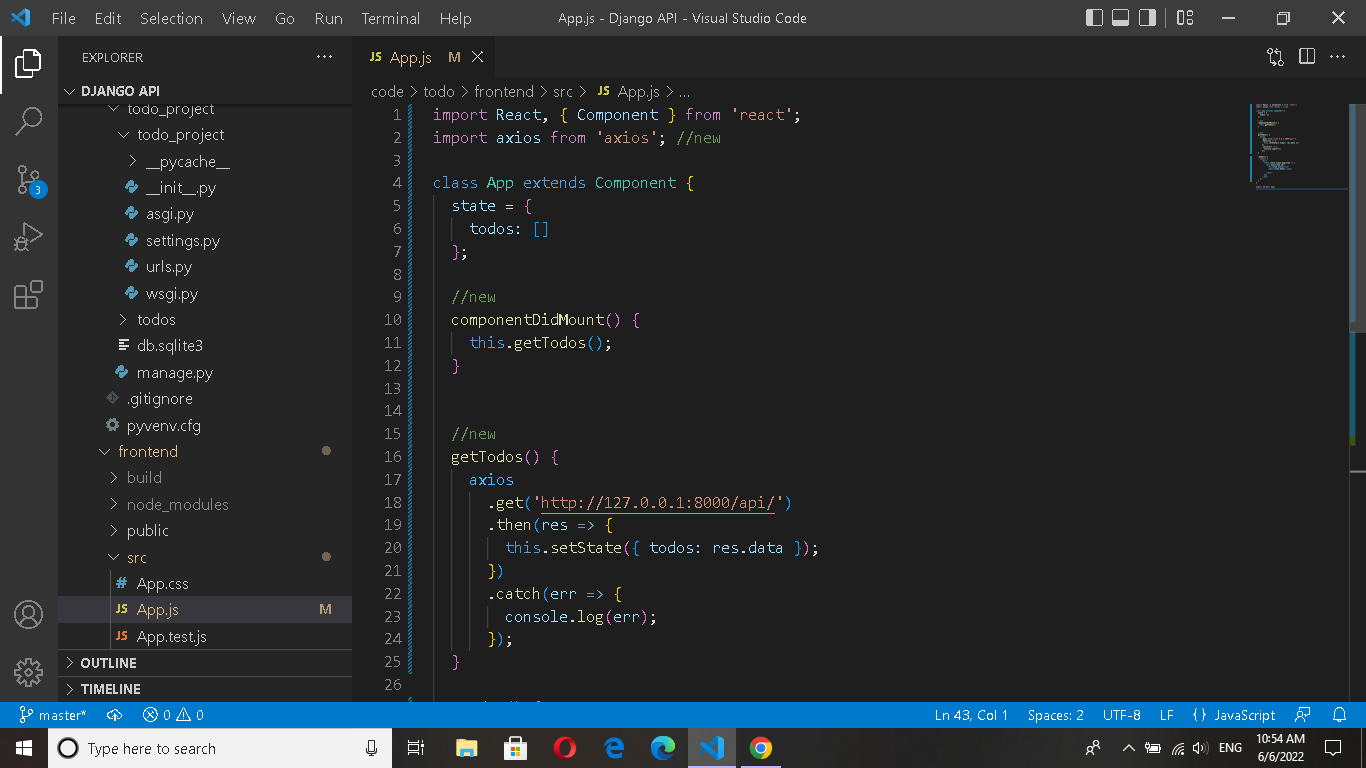
Now we’ll hook into our Todo API instead of using mock data. We’ll use “axios” for this. First install axios and then import it to the “src/App.js” file.

Finally edit the code in the “src/App.js” file.

We will create a Blog API now. First create a new directory inside the “code” folder and name it “blogapi”. Then create a new project, calles “blog_project”. Create a new app in this project and name it “posts”. Add the new app in the “settings.py” file.

Next write the model for the app.

Register your model

Create a superuser in order to login as the admin of your page. Login and create your first post.
Now we’ll write a test.


Install “djangorestframework” and add it to the “settings.py” file:

Write the url for the app in the ‘urls.py’ file.

Now create a “urls.py” file in the “posts” folder and add the following code to it.

Create a “serializers.py” file in the “posts” app and write the code.

At last, write the view for the app in the “views.py” file

Permissions
You can create different users to make posts. In order to login easily as a user, you should change the “urls.py” file in “blog_project” like this.

Anyone can edit, delete, create or update a post now. Only the author of a blog should be able to edit, delete, create or update a post. We will now write the code for permissions. Edit the previous written codes in the “views.py” file like this.

Only logged in users can view the API now. (View-level permissions)
Project-level permissions: change the “settings.py” file like the following and delete the previous changes we’ve made to the “views.py” file.

Now all users have to authenticate before they can access the API. We can make additional view-level changes too.
Custom permission:
Create a “permissions.py” file in the “posts” app and add the following code.

Now change the code in the “views.py” file.

Now only the author of a blog can edit, update or delete a post. Other users will see it as read only.
Authentication
Default authentication.

Token authentication

Add it to installed apps.

There is a tokens page now.
Install “django-rest-auth” and add it to the “settings.py” file.

Add it to the “urls.py” file

User registration
Install “django-allauth” and add the following new configs to the “settings.py” file

Add a new url for registration

Every new registry will get a token now.
Viewsets and routers
Now you’ll see how to achieve the same results in django api with less code.
Go to the “serializers.py” file and add the following code

Now add the following code to the “views.py” file.

Define the urls in the “urls.py” file

Viewsets are used to combine the logic for multiple related views into a single class. We have 4 views now. We can make it to two.

Routers work directly with viewsets to generate URL patterns.
Schema’s and documentation
Schema’s
Install “coreapi” and “pyyaml”
Add the following code to the “urls.py”
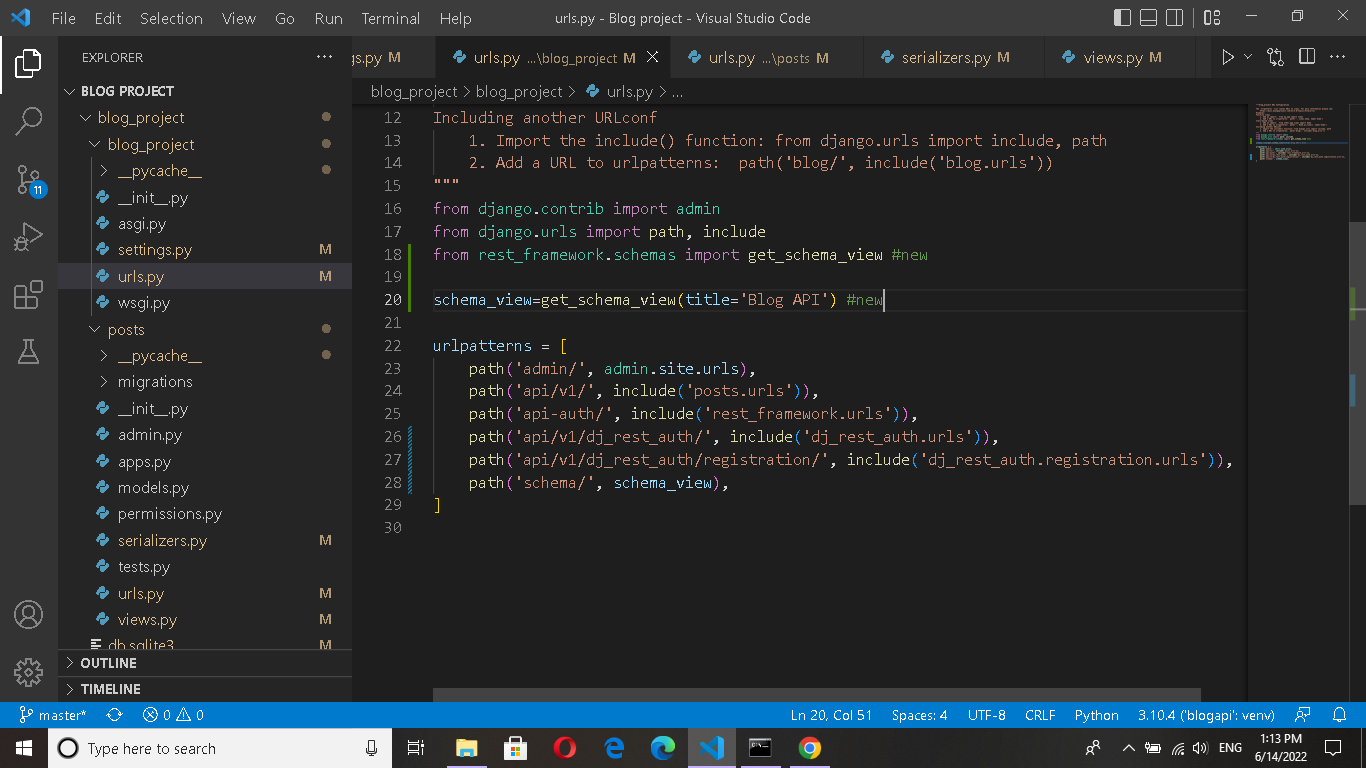
Now you can see the schema of the api
Documentation
Add the following code in the “urls.py” file


Add the following code to the “urls.py” file.
Swagger
Install “django-rest-swagger”.
Add it to the “settings.py” file

Also add it to the “urls.py” file

Also add the following to the “settings.py” file

https://github.com/WirOem/Blogproject-edited-
https://github.com/WirOem/Django_library_todo_api
Comments
Post a Comment